Magic baby Stain remover – Footsteps Photography RAF Mildenhall / Lakenheath
During newborn sessions I get asked all the time “Boy you must do a lot of laundry”. YES. YES. YES. As you can imagine, an undressed naked brand new baby creates a bunch of soiled items. At the end of each studio session it can look like a baby items explosion happened such as blankets, props, wraps, pants sets, and fuzzy rugs are laying around the studio space. At the end everything that was used with baby contact during the session soiled or not gets washed.
Many people have seen the many recipes and versions online for Homemade Laundry soap, well this is my shortcut version that I’ve been making and using over the last 2 years for my family and also for washing all of the many blankets, props and rugs that get used in the studio. I’ve been amazed at this simple but very effective laundry soap.
READ THROUGH ALL DIRECTIONS BEFORE BEGINNING
You will need:
Extra Large Stock Pot (6qt+)
Measuring Cup
Funnel
Grater
Metal Spoon
Whisk
Containers for final Soap Mixture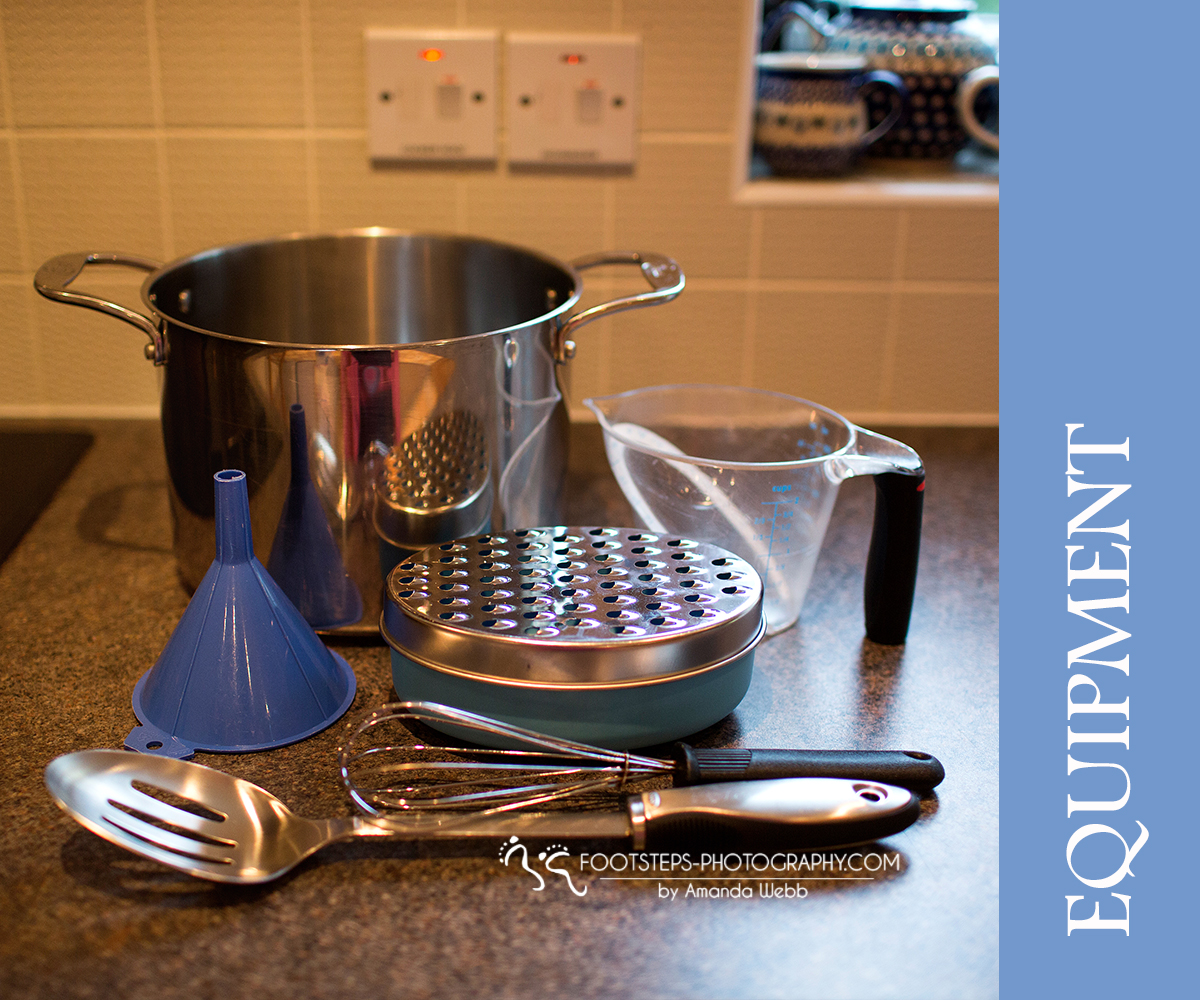
Ingredients:
1 1/2 cups Borax
1 1/2 cups Washing Crystals (soda)
1 bar Fels Naptha Soap
Water
Step 1: Gather all ingredients, equipment and clean containers before beginning.
Step 2: Grate soap and Put all grated soap into pot on the stove
Step 3: Add 12cups of water to pot and cook over low heat melt soap
Step 4: Measure Soda Crystals and Borax
Step 5: Add soda and borax all at once to soap mixture and use a whisk working quickly to incorporate all powder into the soap mixture
Step 6: Once all lumps are broken up switch back to spoon to avoid foam from forming. Once mixture is Honey-like consistency remove from heat
Step 7: Carefully move to sink area
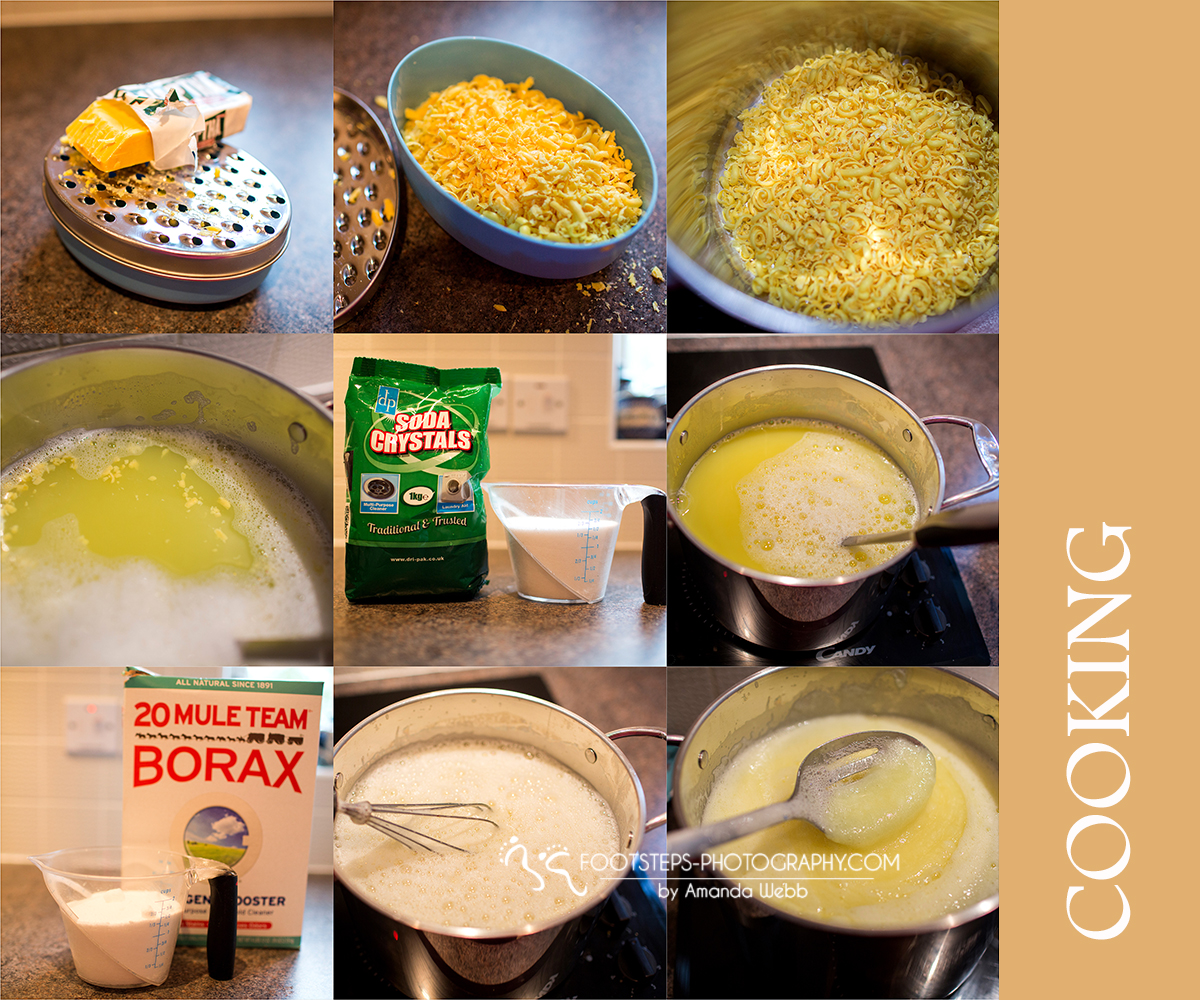
Step 8: Add 8 cups hot tap water to soap mixture to reduce thickness slightly. (do not overflow)
Step 9: Work QUICK!!! Once mixture cools it thickens and is very difficult to work with.
Step 10: Using your Clean containers, a funnel and a measuring cup fill containers with appropriate amount of soap based on container size. (**see amounts below based on container size)
Step 11: Fill all containers with the soap base. Set aside each as you fill it. ((any extra left at the end just divide between containers or make an ULTRA strong one)
Step 12: Use HOT tap water fill containers up to the top. Once it starts foaming let the bubbles die down before topping it off.
Step 13: Shake each container (make sure lid is tight) to blend well. Be careful not to burn yourself if your tap water is super hot.
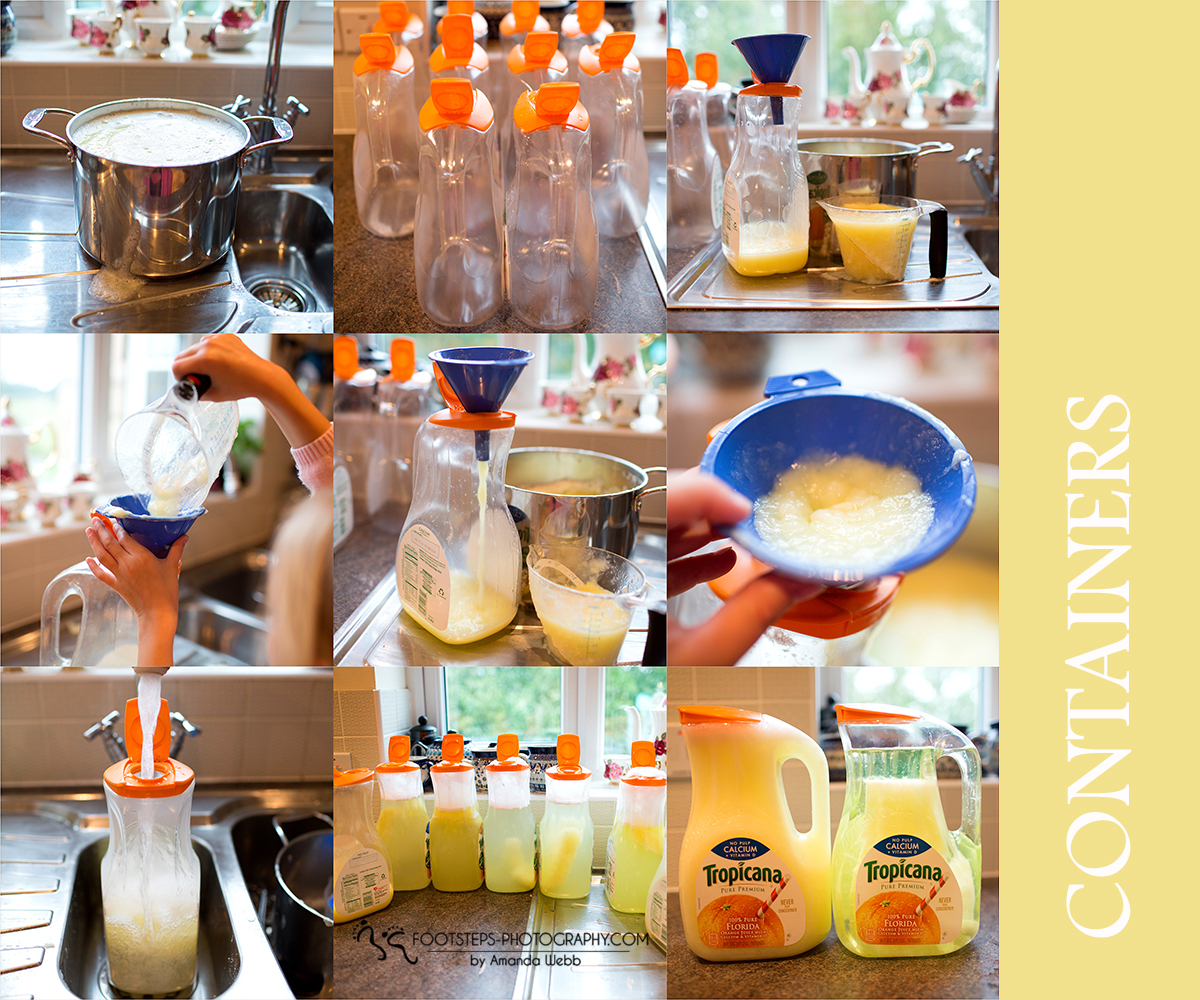
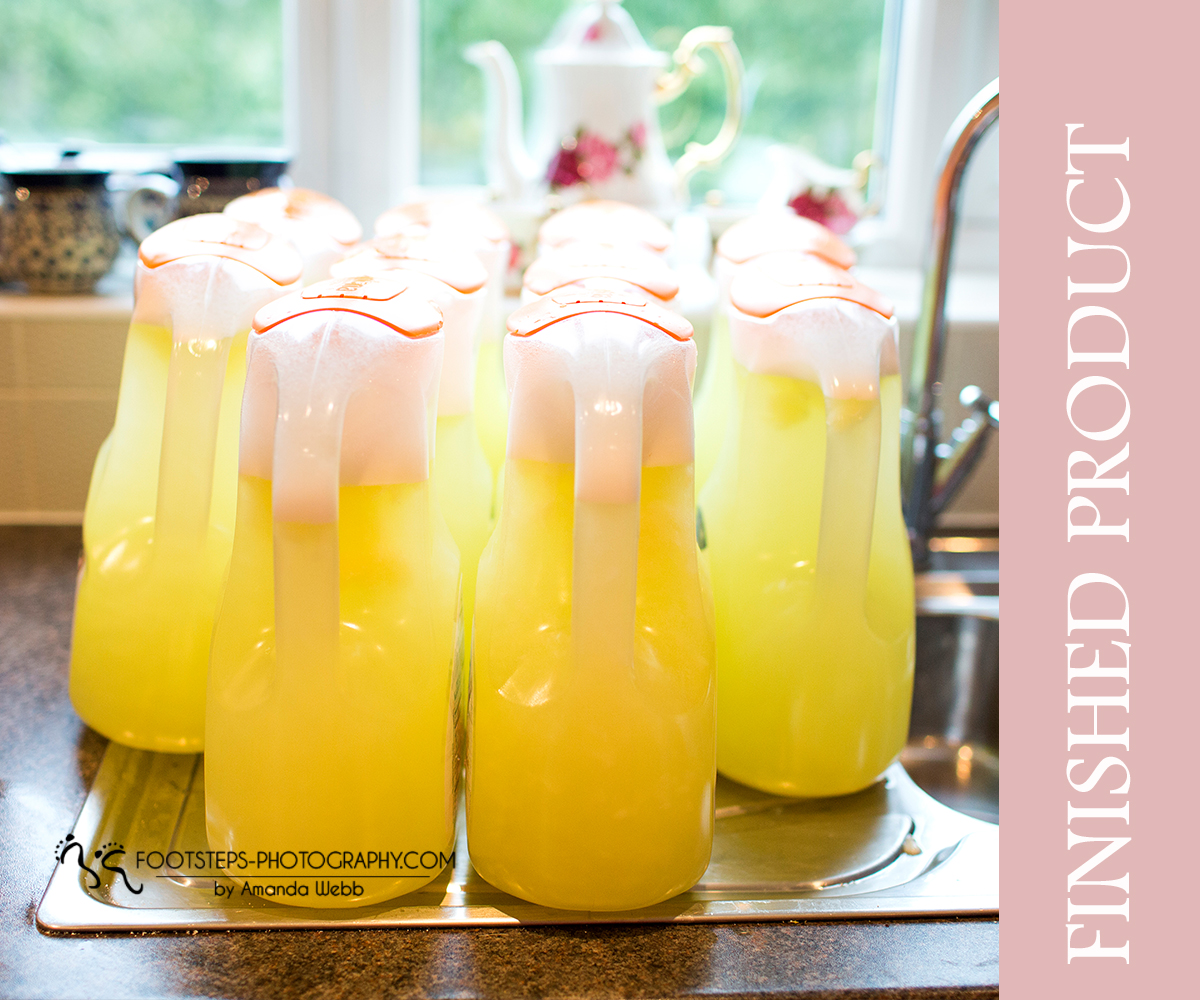
Step 14: Your DONE, you have just made nearly 7 gallons of laundry soap for less than $3.00. Once your mixture sets it may settle (see last image in set above for what it might look like). This is completely normal. Before using it, vigorously shake it up and use as normal.
Start to finish it takes less than 30minutes to complete. All kitchen items used come completely clean in hot water or a dishwasher.
Use 1/4-1/2 cup finished soap per load depending on the size of your washer, the amount of clothes per load and level of soil you have. Larger washers with heavily may need up to a cup but with the price as low per load you can’t beat it. Using a 1/2 cup per load that is 222 loads of laundry soap!!!! Or less than 2cents per load!!!
**Determining amount of Soap Concentrate to use in Step 10
Orange Juice containers used are 89 fl oz in size
Regular Strength
2 cups soap | 9 cups hot water
Ultra Strength
3 1/3 cups soap | 7 2/3 cups hot water
Using a different sized container?
For each 1 cup of laundry soap you will need to use:
Regular Strenth
1/4cup soap | 3/4 cup hot water
Ultra Strength
1/3 cup soap | 2/3 cup hot water
As you can see, it doesn’t have to be EXACT for the soap:water ratio to work. You can vary strength slightly and it will still work just fine. I’ll even make some containers ULTRA strength for those tough laundry loads or as a pre-soak for the really set in stains on clothing. With small children or baby poo stains it is helpful to have some strong stuff on hand as a pre-treater. Just pour a little bit into the stain and rub it around and let it sit a short bit before tossing it into the rest of the laundry.
**A few things to note about the soap**
~The finished soap will not be a solid gel. It will be more of a watery gel that can best be described as an “egg noodle soup” look.
~The soap is a low sudsing soap. So if you don’t see suds, that is ok. Suds are not what does the cleaning, it is the ingredients in the soap. It is HE front loading washer friendly.
~The finished laundry soap is GREAT for sensitive skin as it doesn’t contain any perfumes, dyes and all ingredients are gentle and safe for even baby soft skin. If you’ve got psoriasis, eczema or sensitive skin its worth a shot to try it for yourself.
~Got hard water? Not a problem, Try adding baking soda or oxyclean or vinegar as laundry boosters, suggestions for baking soda are to start with 1/2 cup per load.
~ I use this on all of my own laundry, including darks, and haven’t noticed any change in colors.
~ Be sure to start with clean containers to avoid bacteria growth over time.
NOT recommended to use Vinegar + Bleach + laundry soap as the vinegar will have a negative reaction with the bleach. I have used the laundry soap + bleach myself successfully with no harmful effects.
***User accepts any and all risks in making of this laundry soap, Not responsible for accidents or injuries caused.

